Taking Your Blood Pressure
Taking Your Blood Pressure
Blood pressure is the force of blood against the artery wall as it moves from the heart through the blood vessels. You can take your own blood pressure reading using a digital monitor. Take your readings the same each time, using the same arm. Take readings as often as your healthcare provider instructs.
About blood pressure monitors
Blood pressure monitors are designed for certain ages and cases. You can find monitors for older adults, for pregnant women, and for children. Make sure the one you choose is the right one for your age and situation.
The American Heart Association recommends an automatic cuff monitor that fits on your upper arm (bicep). The cuff should fit your arm size. A cuff that’s too large or too small will not give an accurate reading. Measure around your upper arm to find your size.
Monitors that attach to your finger or wrist are not as accurate as monitors for your upper arm.
Ask your healthcare provider for help in choosing a monitor. Bring your monitor to your next provider visit if you need help in using it the correct way.
The steps below are general instructions for using an automatic digital monitor.
Step 1. Relax
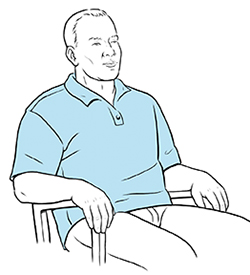
Take your blood pressure at the same time every day, such as in the morning or evening, or at the time your healthcare provider recommends.
Wait at least a half-hour after smoking, eating, or exercising. Don't drink coffee, tea, soda, or other caffeinated beverages before checking your blood pressure.
Sit comfortably at a table with both feet on the floor. Do not cross your legs or feet. Place the monitor near you.
Rest for a few minutes before you begin.
Step 2. Wrap the cuff
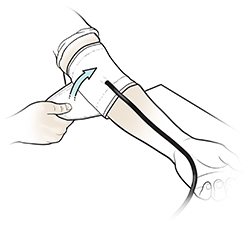
Place your arm on the table, palm up. Your arm should be at the level of your heart. Wrap the cuff around your upper arm, just above your elbow. It’s best done on bare skin, not over clothing. Most cuffs will indicate where the brachial artery (the blood vessel in the middle of the arm at the inner side of the elbow) should line up with the cuff. Look in your monitor's instruction booklet for an illustration. You can also bring your cuff to your healthcare provider and have them show you how to correctly place the cuff.
Step 3. Inflate the cuff

Push the button that starts the pump.
The cuff will tighten, then loosen.
The numbers will change. When they stop changing, your blood pressure reading will appear.
Take 2 or 3 readings one minute apart.
Step 4. Write down the results of each reading
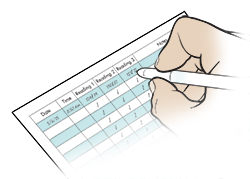
Write down your blood pressure numbers for each reading. Note the date and time. Keep your results in one place, such as a notebook. Even if your monitor has a built-in memory, keep a hard copy of the readings.
Remove the cuff from your arm. Turn off the machine.
Bring your blood pressure records with your healthcare providers at each visit.
If you start a new blood pressure medicine, note the day you started the new medicine. Also note the day if you change the dose of your medicine. This information goes on your blood pressure recording sheet. This will help your healthcare provider monitor how well the medicine changes are working.
Ask your healthcare provider what numbers should prompt you to call him or her. Also ask what numbers should prompt you to get help right away.
Updated:
March 21, 2017
Reviewed By:
Cunningham, Louise, RN,Fraser, Marianne, MSN, RN,Gandelman, Glenn, MD, MPH