Discharge Instructions: Using Injection Pens
Discharge Instructions: Using Injection Pens
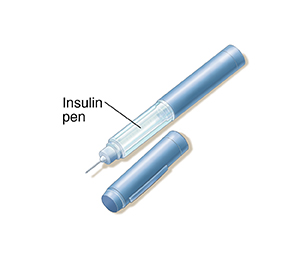
Your healthcare provider has prescribed a medicine that you can give yourself using an injection pen. One medicine that is commonly given with an injection pen is insulin. Injection pens are popular because they are easy to use. Also, many people like how pens look better than syringes.
Injection pens can be disposable or nondisposable:
Disposable pens come already filled (prefilled) with a set amount of medicine. Once you inject the medicine, you throw the pen away.
With nondisposable pens, you replace the medicine cartridge when it is empty.
Both types of pens need a pen needle. This is screwed onto the tip of the pen before each injection. Pen needles come in different lengths and thicknesses. Always throw away needles right after you use them. Never reuse needles.
Step 1. Gather your supplies
Alcohol swabs
Injector pen
Pen needle
Cartridge if pen is the nondisposable type
Special container to throw out the used needles and disposable pens (sharps container). You can buy a sharps container at a drugstore or medical supply store. You can also use an empty laundry detergent bottle, or any other puncture-proof container and lid.
Step 2. Prepare the pen
Each pen will come with its own special instructions. Read the directions that came with your pen. Discuss the instructions with your diabetes care team or diabetes educator before injecting insulin. In general here is what to do:
Wash your hands.
Remove the pen cap.
Check the medicine. Make sure it is the type your provider prescribed. Check that it has not expired. Also check that it's not discolored, frosted, or lumpy. If the medicine doesn't look right to you, don’t use it. Get a new cartridge or a new disposable pen. Never share injection pens or medicine cartridges.
Some medicines need to be mixed. You can do this by rolling the pen between your palms about 20 times. You can also tip the pen back and forth.
Attach a needle to your pen. Read the directions that came with your pen. They will give you the steps for attaching a needle. If you’re using a nondisposable pen, don’t leave the needle attached to the pen between shots.
Step 3. Prime the pen and set the dose
Prime your pen and make sure that it's working by doing a trial shot in the air before actually injecting your medicine. Then set the dose.
Dial the pen to give 2 or 3 units of medicine.
Hold the pen with the needle pointing up in the air.
Tap the barrel of the pen. This will make sure that any air bubbles in the cartridge float to the top of the cartridge.
Push down firmly on the pen's injector button. This will send medicine into the air. You should see a couple of drops of medicine come out of the needle. If nothing comes out, try doing another air shot. If medicine still doesn't come out after a second try, your pen may be low on medicine. Or the needle may not be connected properly. Look at the troubleshooting tips in the directions that came with your pen.
Set your dose. Dial the pen to give the amount of medicine you need to take. As you turn the dial, you should hear a clicking sound. Your pen is now ready to use.
Step 4. Inject your medicine
Choose an injection site. The belly (abdomen), upper arms, thighs, and buttocks are the most common sites to use. Don't use sites that are close to a mole or scar. Make sure sites are more than 2 inches away from your belly button.
Make sure the site is clean. Clean it with an alcohol swab. Let it dry.
Pinch up a fold of skin around the site you've picked. Hold it firmly with one hand.
In your other hand, hold the injection pen like a pencil.
Put the needle straight into the pinched-up skin. Thin adults or children may need to inject the needle at a slight angle. Your healthcare provider will show you what is best for you.
Make sure the needle gets all the way into the fatty tissue below the skin.
Push the pen injection button. Unless you take a very small dose, the injection should take a couple of seconds. You may have to hold the pen in 5 to 10 seconds after injecting the insulin. This will depend on the insulin pen you are using. Carefully follow the instructions that came with your pen. Or follow the advice your diabetes care team or diabetes educator gives you.
Let go of the skin and remove the needle from your skin.
Step 5. After the injection
If you are using a nondisposable pen, remove the needle by unscrewing it.
Put any used needles or disposable pens into the sharps container. Make sure that needles point down. Never put your fingers into the container.
When the sharps container is full, take it back to your healthcare facility. The staff will get rid of it for you.
Follow-up care
Follow up with your healthcare provider, or as advised.
When to seek medical care
Call your healthcare provider right away if you have any of the following:
Problems that stop you from giving your injection
Bleeding at the injection site for more than 10 minutes
Pain at the injection site that does not go away
Accidental or improper injection, such as:
Injecting the medicine in the wrong area
Injecting too much medicine
Rash at the injection site
Fever of 100.4°F (38°C) or higher, or as directed by your healthcare provider
Redness, warmth, swelling, or drainage at the injection site
Signs of allergic reaction. These include trouble breathing, hives, or rash.
Updated:
October 10, 2017
Reviewed By:
Image reviewed by StayWell medical illustration team.,Perez, Eric, MD,Pierce-Smith, Daphne, RN, MSN, CCRC,Turley, Ray, BSN, MSN,Ziegler, Olivia, MS, PA